How to use HC-SR04 Ultrasonic Sensor on Arduino UNO
📖 Overview
This course is designed for beginners who want to learn how to use the HC-SR04 Ultrasonic Sensor with Arduino Uno to measure the distance between the sensor and an object. By the end of this course, students will be able to build a simple project that uses the HC-SR04 Ultrasonic Sensor to monitor distance and display the results on the serial monitor.
Students will learn how to connect the HC-SR04 Ultrasonic Sensor to the Arduino Uno, write code to read the sensor data, and calculate the distance using the sensor's readings. They will also learn how to use the serial monitor to display the distance measurements.
The skills learned in this course can be applied to a variety of real-world projects, such as obstacle detection, robotic navigation, and home automation. The HC-SR04 Ultrasonic Sensor is a widely used and affordable sensor that provides accurate distance measurements, making it a great choice for many applications.
Key topics covered in this course include:
- Introduction to the HC-SR04 Ultrasonic Sensor and its specifications
- Connecting the HC-SR04 Ultrasonic Sensor to the Arduino Uno
- Writing code to read sensor data and calculate distance
- Using the serial monitor to display distance measurements
By completing this course, students will gain hands-on experience with the HC-SR04 Ultrasonic Sensor and Arduino Uno, and will be able to apply their knowledge to build more complex projects in the future.
🔌 Components & Wiring Guide
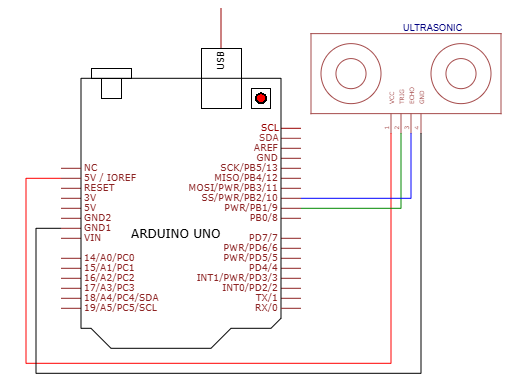
Components & Wiring Guide
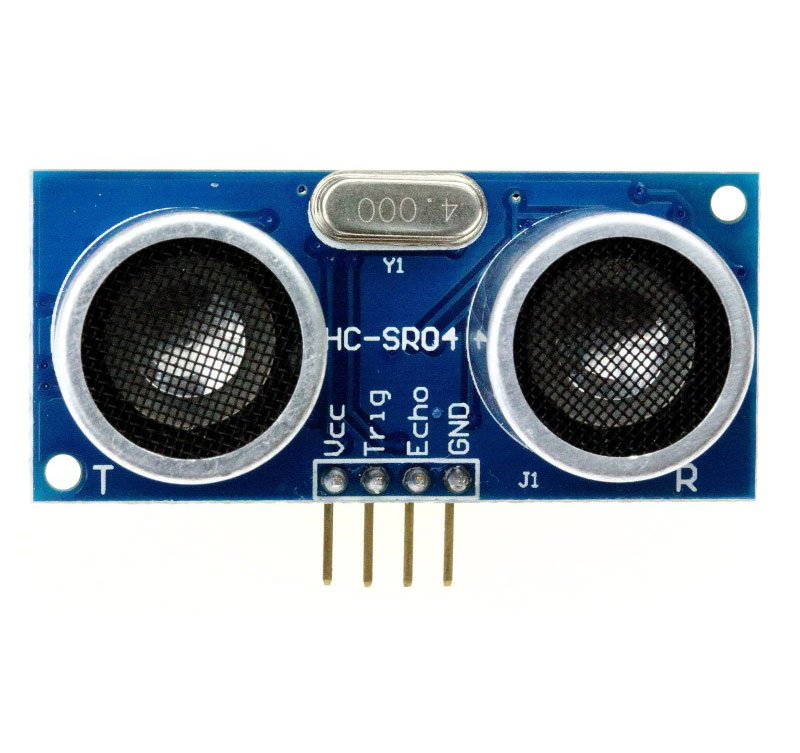
The following components are required for this project:- HC-SR04 Ultrasonic Sensor: measures the distance between the sensor and an object
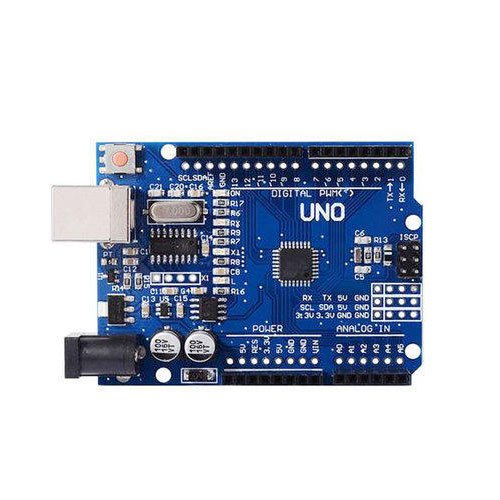
- Arduino Uno: the microcontroller board that processes sensor data and performs actions
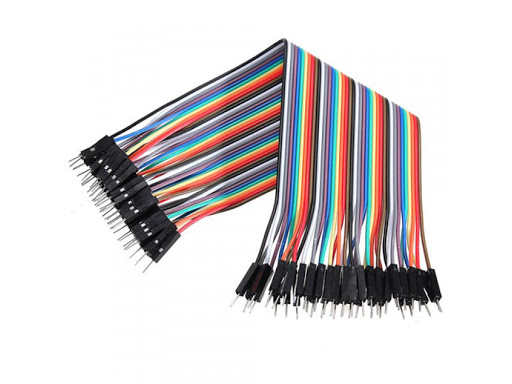
- Jumpers: connect components on the breadboard to the Arduino Uno
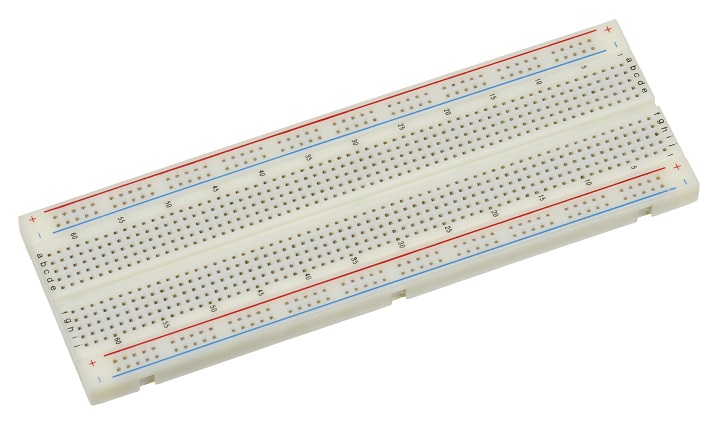
- Breadboard: a platform for prototyping and connecting electronic components
| HC-SR04 Ultrasonic Sensor Pin | Connection |
|---|---|
| VCC | Arduino Uno 5V pin |
| GND | Arduino Uno GND pin |
| Trig | Arduino Uno digital pin (e.g., pin 9) |
| Echo | Arduino Uno digital pin (e.g., pin 10) |
🛠️ Step-by-Step Guide
How to use HC-SR04 Ultrasonic Sensor on Arduino UNO
This tutorial will guide you through the process of setting up and using the HC-SR04 Ultrasonic Sensor with an Arduino Uno to measure the distance between the sensor and an object.
Step 1: Setup and Hardware Requirements
To start this project, you will need the following hardware components: HC-SR04 Ultrasonic Sensor, Arduino Uno, Jumpers, and a Breadboard. Make sure you have all these components before proceeding.
Step 2: Connect the HC-SR04 Ultrasonic Sensor to the Breadboard
Place the HC-SR04 Ultrasonic Sensor on the breadboard. The sensor has four pins: VCC, TRIG, ECHO, and GND. Identify these pins and prepare them for connection to the Arduino Uno.
Step 3: Connect the HC-SR04 Ultrasonic Sensor to the Arduino Uno
Connect the VCC pin of the HC-SR04 Ultrasonic Sensor to the 5V pin on the Arduino Uno, the GND pin to the GND pin on the Arduino Uno, the TRIG pin to any digital pin on the Arduino Uno (e.g., pin 9), and the ECHO pin to any digital pin on the Arduino Uno (e.g., pin 10). Use jumpers to make these connections.
Step 4: Wiring Recap
Recap the wiring to ensure everything is connected correctly:
- VCC to 5V
- GND to GND
- TRIG to digital pin 9
- ECHO to digital pin 10
Step 5: Write and Upload the Firmware
Open the Arduino IDE and create a new project. Use the following code to read the distance from the HC-SR04 Ultrasonic Sensor:
const int trigPin = 9;
const int echoPin = 10;
void setup() {
  pinMode(trigPin, OUTPUT);
  pinMode(echoPin, INPUT);
  Serial.begin(9600);
}
void loop() {
  digitalWrite(trigPin, LOW);
  delayMicroseconds(2);
  digitalWrite(trigPin, HIGH);
  delayMicroseconds(10);
  digitalWrite(trigPin, LOW);
  long duration = pulseIn(echoPin, HIGH);
  int distance = duration * 0.034 / 2;
  Serial.print("Distance: ");
  Serial.print(distance);
  Serial.println(" cm");
  delay(1000);
}Step 6: Testing the Project
After uploading the firmware, open the serial monitor in the Arduino IDE. Place an object in front of the HC-SR04 Ultrasonic Sensor and observe the distance readings in the serial monitor. The distance should be displayed in centimeters.
Step 7: Troubleshooting Tips
If you encounter any issues, check the following:
- Verify that all connections are secure and correct.
- Ensure the HC-SR04 Ultrasonic Sensor is properly powered.
- Check the serial monitor baud rate (it should be set to 9600).
- Make sure there are no obstacles between the sensor and the object being measured.
💻 Sample Code
const int trigPin = 2;  // define the trigger pin
const int echoPin = 3;  // define the echo pin
void setup() {
  // initialize serial communication at 9600 bits per second
  Serial.begin(9600);
  // set the trigPin as an output and the echoPin as an input
  pinMode(trigPin, OUTPUT);
  pinMode(echoPin, INPUT);
}
void loop() {
  // make the trigger pin high for 10 microseconds to send the ultrasonic wave
  digitalWrite(trigPin, HIGH);
  delayMicroseconds(10);
  digitalWrite(trigPin, LOW);
  // calculate the distance based on the time it took for the wave to bounce back
  long duration = pulseIn(echoPin, HIGH);
  float distance = (duration * 0.034 / 2);
  // print the calculated distance to the serial monitor
  Serial.print("Distance: ");
  Serial.print(distance);
  Serial.println(" cm");
  delay(1000);  // wait for 1 second before taking the next measurement
}
📝 Check Your Understanding
1. What is the primary function of the HC-SR04 Ultrasonic Sensor in this project?
   a) To measure temperature
   b) To measure humidity
   c) To measure distance between the sensor and an object
   d) To measure light intensity
   Answer: c

2. How do you connect the VCC pin of the HC-SR04 Ultrasonic Sensor to the Arduino Uno?
   a) To the GND pin
   b) To the 5V pin
   c) To the 3.3V pin
   d) To any digital pin
   Answer: b

3. What is the purpose of the pulseIn function in the Arduino code for this project?
   a) To send a pulse to the sensor
   b) To read the distance value from the sensor
   c) To measure the width of the pulse from the sensor
   d) To set the trigger pin high
   Answer: c

4. What is the correct sequence of operations to get a distance reading using the HC-SR04 Ultrasonic Sensor?
   a) Set trigger pin low, set trigger pin high, wait for 10us, set trigger pin low, read echo pin
   b) Set trigger pin high, set trigger pin low, wait for 10us, read echo pin
   c) Set trigger pin low, wait for 2us, set trigger pin high, wait for 10us, set trigger pin low, read echo pin
   d) Set trigger pin high, wait for 10us, set trigger pin low, read echo pin
   Answer: c

5. What unit of measurement is typically used to display the distance value read by the HC-SR04 Ultrasonic Sensor in this project?
   a) Inches
   b) Feet
   c) Centimeters
   d) All of the above
   Answer: d
Need the Components for This Project?
If you don't already have the components listed above, you can buy genuine Arduino, ESP32, Raspberry Pi, sensors, and other electronic components from SoftTech Supply Shop, with fast delivery across Kigali and other parts of Rwanda.
← Browse more Arduino & IoT tutorialsRelated Tutorials
How to use ATGM336H GPS+BDS Module with Antenna with an Arduino Uno
ATGM336H GPS+BDS Module with Antenna, Arduino Uno R3 With USB Cable, Male to Male Jumper Wires, Breadboard 830 Point Solderless
How to build a line tracking robot using Arduino UNO AND infrared sensor
Arduino Uno R3 With USB Cable, L293D Motor Driver Board, DC Gear Motor+wheels smart car set, TCRT5000 Infrared Reflective IR Photoelectric Line Track Sensor Module, 3.7V 3 Slot 18650 Battery holder, Rocker Switch Spst, 18650 3.7V 2800mAh Lithium Ion Battery
How to Install the Arduino IDE and Get Started on Your Computer
Computer, Internet connection, Arduino Uno R3 With USB Cable
How to Use the HC-SR501 PIR Motion Sensor Module with an Arduino Uno
Arduino Uno R3 With USB Cable, Male to Male Jumper Wires, Breadboard 830 Point Solderless, HC-SR501 PIR module Sensor Detector Module